Best New York Style Pizza Dough Recipe!
Did you know that over 60% of Americans crave pizza weekly, and a staggering number dream of replicating that iconic New York slice at home? But why do so many attempts fall flat, resulting in a cracker-like crust instead of that perfect, chewy, foldable delight?
STOP settling for subpar homemade pizza! You’re probably closer than you think to mastering the art of a true New York-style pizza dough. Forget complicated techniques and elusive ingredients.
This New York style pizza dough recipe is not just a recipe; it’s your passport to authentic flavour and texture. Ready to elevate your pizza night and finally achieve that coveted chewy crust? Let’s unlock the secrets to the best new york style pizza dough recipe you’ll ever make.
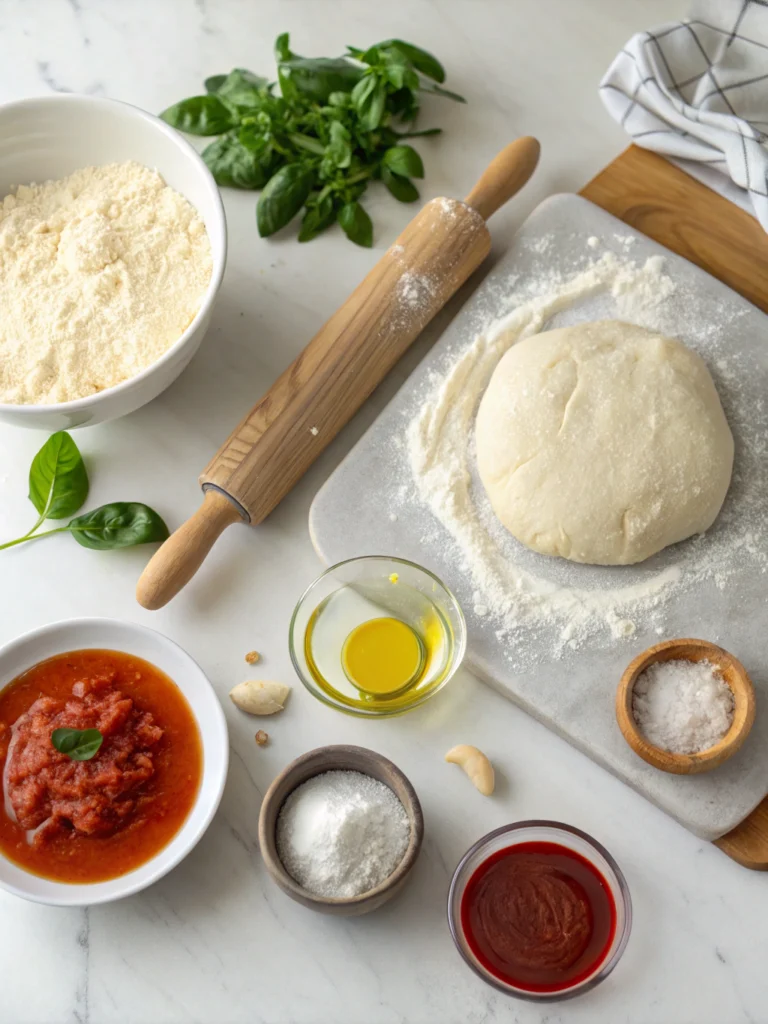
Ingredients List
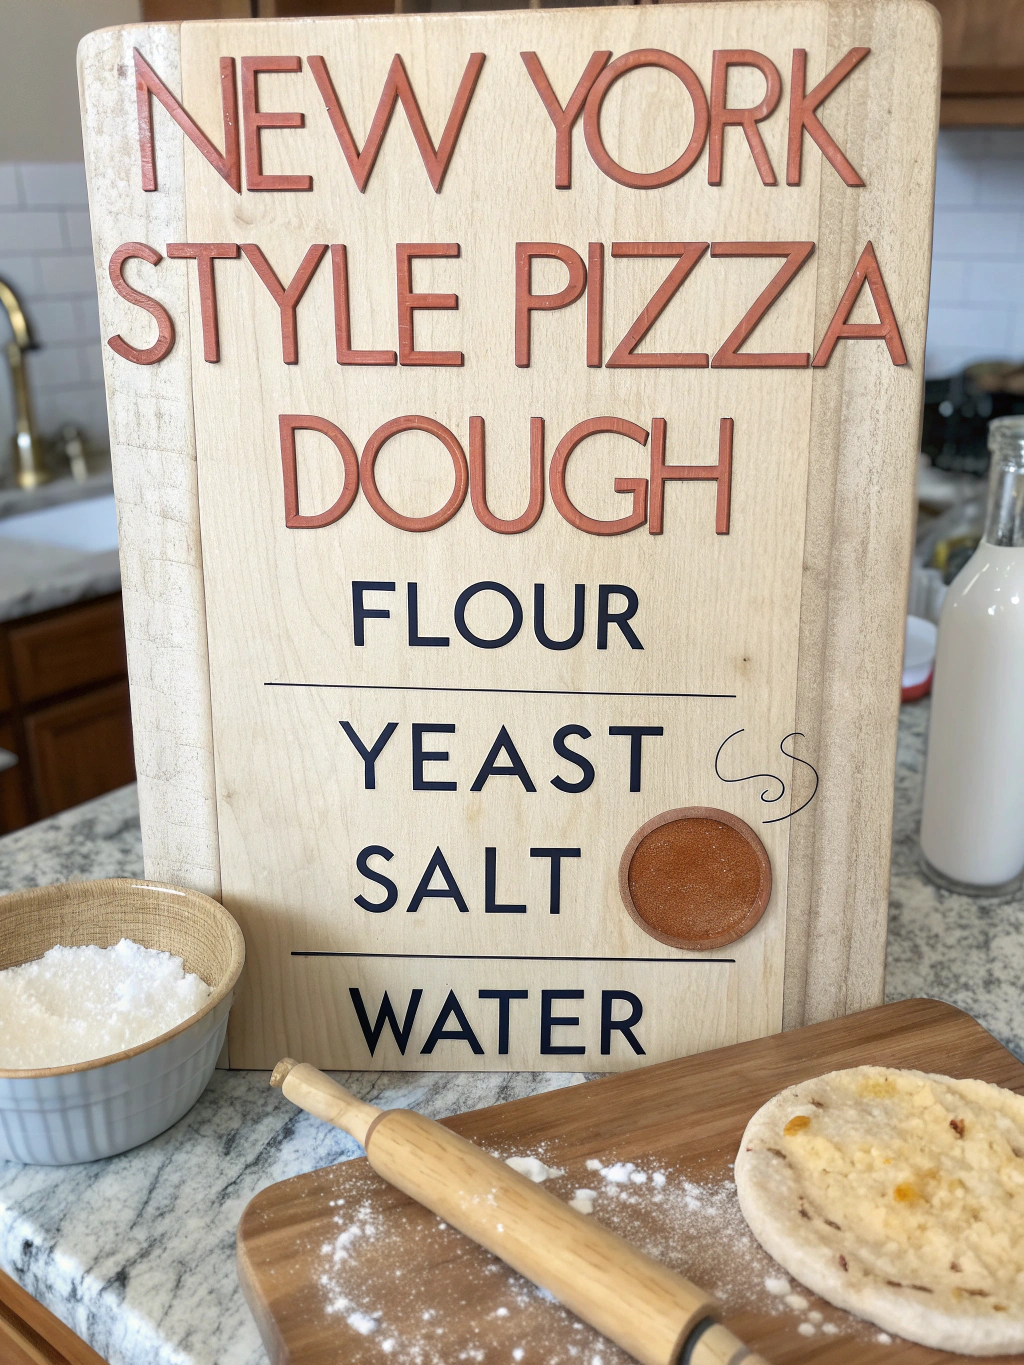
Crafting the perfect New York-style crust starts with carefully selecting simple ingredients. It’s about quality and understanding how each component plays its part:
- All-Purpose Flour (King Arthur or similar high-protein): While bread flour is often recommended for chewy crusts, a high-quality all-purpose flour with a protein content around 11-12% can yield fantastic results for a balanced chewiness. Look for brands like King Arthur. Substitution Idea: If you can’t find high-protein all-purpose flour, you can use bread flour, but be prepared for a slightly chewier dough.
- Instant Dry Yeast: This is your leavening agent, creating those beautiful air pockets that define a great pizza crust. Instant yeast is convenient because you don’t need to activate it separately. Substitution Idea: Active dry yeast can be used, but you’ll need to activate it in warm water (about 100-110°F) for 5-10 minutes before adding it to the dry ingredients.
- Warm Water: The temperature is crucial – think bathwater warm, not hot. This helps activate the yeast. Aim for around 95-105°F (35-40°C). Water quality can impact dough. Filtered water is a good option if your tap water has strong flavours.
- Fine Sea Salt: Salt is essential for flavour development, controls the yeast activity, and strengthens the gluten structure. Fine sea salt dissolves easily.
- Olive Oil (Extra Virgin): A touch of olive oil adds richness, helps with elasticity, and contributes to a beautiful golden crust colour. Use a good quality extra virgin olive oil for the best flavour. Substitution Idea: Vegetable oil can be used in a pinch, but it lacks the characteristic flavour profile of olive oil.
- Sugar (Optional, Pinch): A tiny pinch of sugar can give the yeast a little boost, leading to a faster rise and a slightly sweeter crust. It’s not strictly necessary, but it can add a nice touch.
Gathering these simple ingredients is the first exciting step on your journey to authentic New York pizza. Notice how few there are? The magic happens in the technique and fermentation.
Timing
Understanding the timeline is key to successful pizza dough. This new york style pizza dough recipe requires a bit of patience for the best results, but it’s surprisingly efficient:
- Preparation Time: ~15-20 minutes (Mixing ingredients, initial kneading)
- Rising Time: 1.5 – 24+ hours (Bulk fermentation)
- Shaping Time: ~5-10 minutes per dough ball
- Total Time (excluding long fermentation): ~1.5 – 2.5 hours
While the minimal rising time is around 1.5 hours, a slow, cold fermentation in the refrigerator (24-72 hours or even longer) is where the true magic of flavour development happens. Data suggests that dough fermented for 24 hours at cold temperatures develops significantly more complex flavours and better structure compared to dough risen quickly at room temperature. Think of it as an investment in flavour – a typical room temperature rise might take 60-90 minutes, but a cold ferment for 24 hours adds little active time to your schedule while boosting flavour exponentially. While the minimum time is around 90 minutes, committing to a 24-hour cold ferment might add only 10 minutes of extra hands-on time. However, the flavour payoff is immense, making it a worthwhile investment for serious pizza lovers!
Step-by-Step Instructions
Let’s get our hands doughy! Follow these steps carefully to create your perfect new york style pizza dough recipe:
Combine Dry Ingredients
In a large bowl, whisk together the flour and salt. If using the optional pinch of sugar, add it here as well. Creating wells in the centre of the dry ingredients. This ensures even distribution.
Add Wet Ingredients
Pour the warm water into the well you created. Sprinkle the instant dry yeast evenly over the water. Add the olive oil. You’ll start to see the yeast becoming active nearly immediately.
Initial Mixing
Using a wooden spoon or your hands, start mixing from the centre, gradually incorporating the flour into the wet ingredients. Mix until a shaggy dough forms. Don’t worry if it looks rough at this stage; it will come together. This initial mixing takes about 2-3 minutes.
Kneading
Turn the shaggy dough out onto a lightly floured surface. Knead the dough for 8-10 minutes. The dough should become smooth, elastic, and less sticky. If using a stand mixer with a dough hook, knead on low speed for about 6-8 minutes. A good test for proper kneading is the “windowpane test”: tear off a small piece of dough and gently stretch it between your fingers. If you can stretch it thin enough to see light passing through without tearing immediately, your gluten is well-developed. Pro Tip: Don’t add too much extra flour while kneading! A slightly tacky dough is better than a dry one.
First Rise (Bulk Fermentation)
Lightly grease a clean bowl with olive oil. Place the kneaded dough in the bowl, turning it to coat all sides with oil. Cover the bowl tightly with plastic wrap or a damp towel. For a minimum rise, let it rise at room temperature in a warm spot for 1.5-2 hours, or until it has doubled in size. Transfer the covered bowl to the refrigerator for a slow, cold fermentation (24-72 hours) for superior flavour. This slow rise develops deeper, more complex flavours.
Divide and Shape
Once the dough has risen (either at room temperature or cold), gently punch it down to release the air. Turn the dough out onto a lightly floured surface. Divide the dough into portions (usually 2-4, depending on your desired pizza size). Gently form each portion into a smooth ball by tucking the edges underneath.
Second Rise (Bench Rest)
Place the dough balls on a lightly floured surface or a baking sheet lined with parchment paper. Cover them loosely with plastic wrap or a damp towel. Let them rest for 30-60 minutes at room temperature. This relaxes the gluten and makes the dough easier to stretch. If you cold-fermented the dough, let the dough balls come to room temperature for at least 1-2 hours before stretching.
Stretching the Dough
This is where the New York style comes in! Starting with a rested dough ball, gently flatten it with your fingertips on a lightly floured surface. Avoid using a rolling pin, as this deflates the air and results in a denser crust. Work your way outwards from the centre, leaving a slightly thicker rim for the crust. You can lift the dough and gently stretch it with your hands, allowing gravity to help. Aim for a rough circle or oval shape, thin in the centre and thicker around the edge. You should be able to see through the thin part of the dough. Practice makes perfect here!
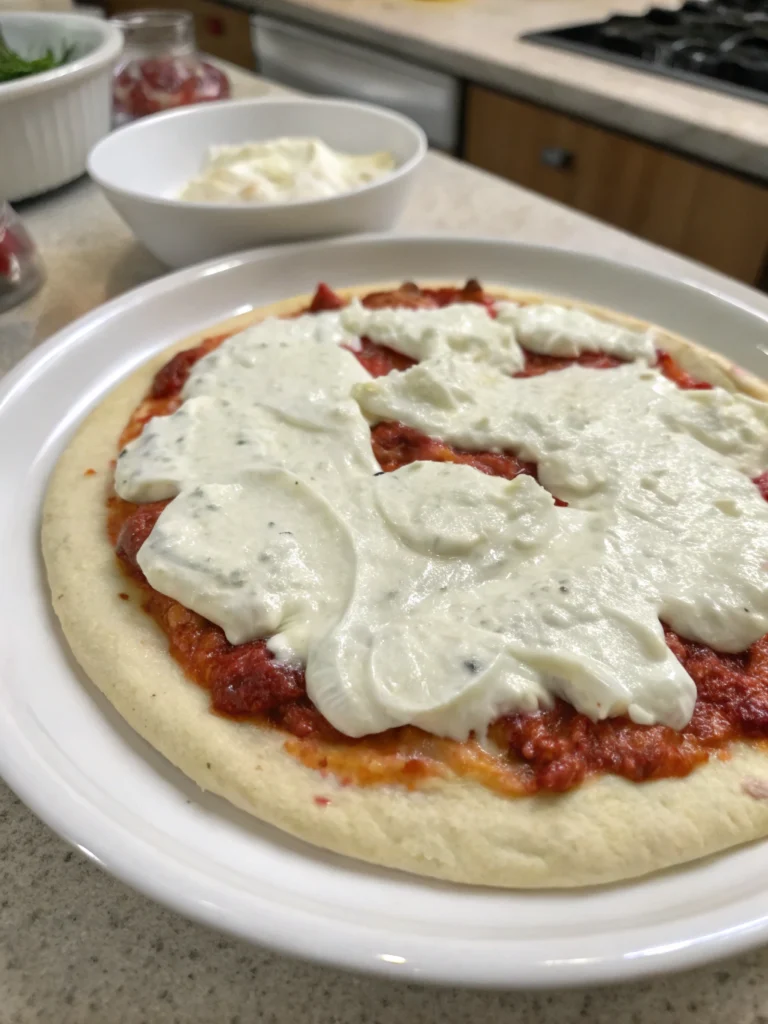
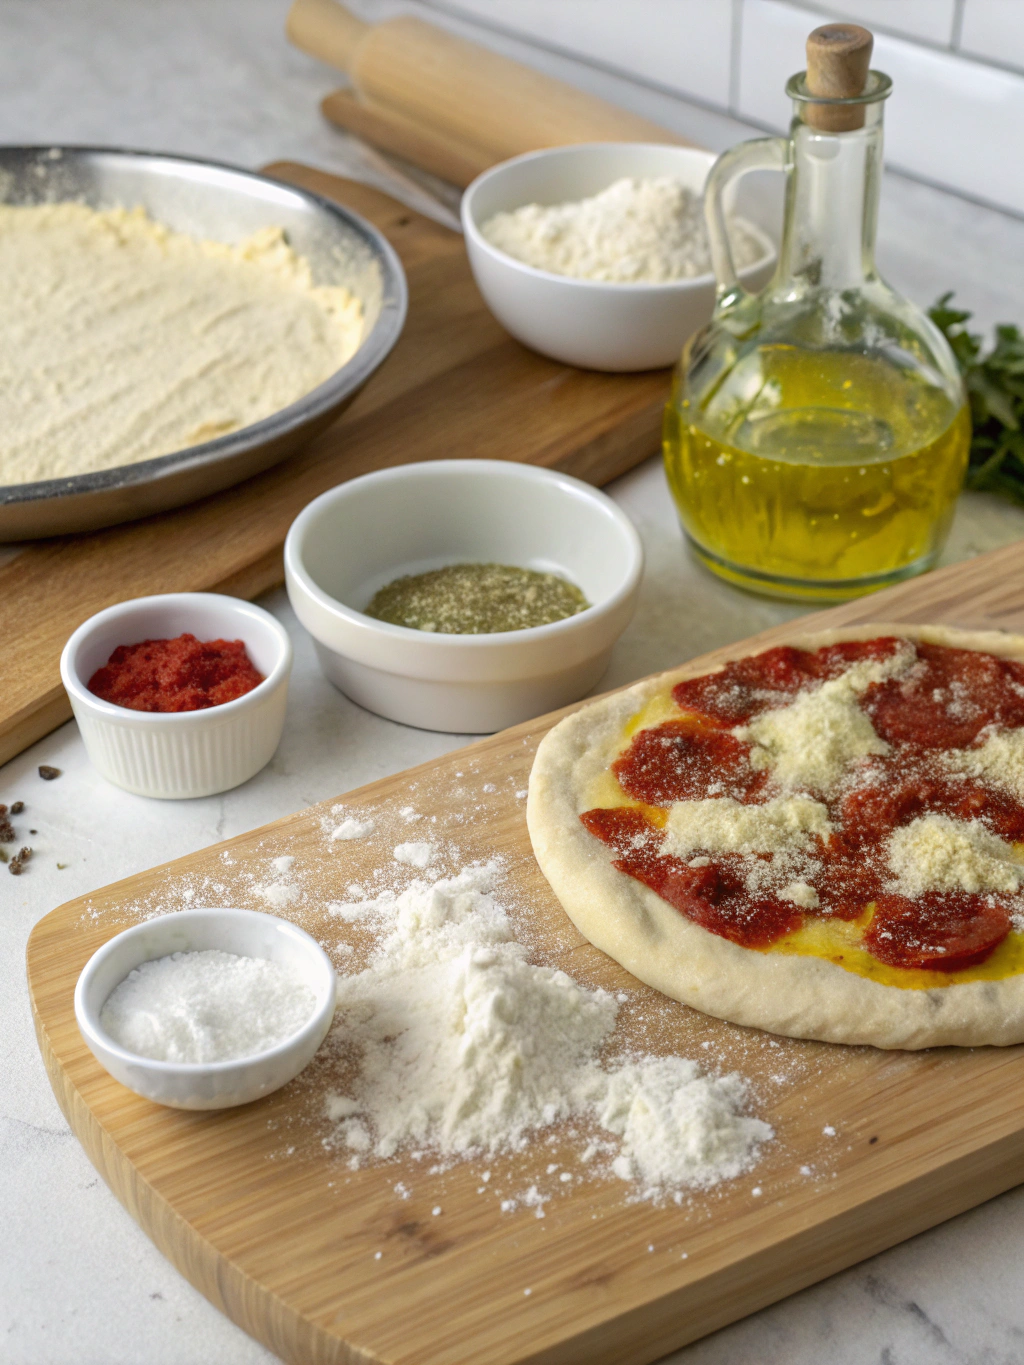
Topping and Baking
Carefully transfer the stretched dough to a pizza peel dusted with cornmeal or semolina. Quickly add your sauce, cheese, and toppings, being careful not to overload the pizza. Transfer the pizza to a preheated stone or steel in a hot oven (500-550°F or 260-290°C) or grill. Bake for 8-15 minutes, rotating halfway through, until the crust is golden brown and the cheese is bubbly and slightly browned.
Enjoy the satisfaction of pulling a perfectly crafted New York-style pizza from your oven!
Nutritional Information
Understanding the nutritional makeup of your homemade pizza dough can be helpful, especially if you’re tracking your intake. While exact values can vary based on ingredients and portion sizes, here’s a general idea based on typical data for a single serving of plain New York-style pizza dough before toppings:
- Calories: Approximately 200-250 calories
- Protein: Around 6-8 grams
- Carbohydrates: Approximately 40-50 grams
- Fat: Around 2-4 grams (primarily from olive oil)
- Fibre: Around 1-2 grams
Remember that traditional New York-style pizza dough is not inherently a “health food” due to its white flour base. However, making it at home gives you control over ingredient quality and portion size, which is a significant advantage compared to many commercially produced options. According to recent food data analyses, even with white flour, homemade pizza dough often has fewer additives and preservatives than store-bought versions.
Healthier Alternatives for the Recipe
While the classic New York style pizza dough recipe is delicious, you can make thoughtful modifications to boost its nutritional profile without sacrificing too much flavour or texture. Here are some ideas:
- Partial Whole Wheat: Substitute 25-50% of the all-purpose flour with whole wheat flour. This increases fibre content and provides a slightly nuttier flavour. Start gradually to adjust to the difference in texture. Data shows that even a 25% substitution significantly increases dietary fibre.
- Alternative Grains: Experiment with small amounts of other flours like spelt or rye for added flavour and nutrients. These flours absorb water differently, so you may need to adjust the liquid slightly.
- Reduce Salt: While salt is crucial for flavour and structure, you can slightly reduce the amount if you monitor sodium intake. Be mindful not to reduce it too much, as it impacts yeast activity and crust development. Many health guidelines recommend limiting sodium intake.
- Reduce Olive Oil: While olive oil adds flavour and tenderness, you can slightly reduce the amount (by 10-20%) without drastically affecting the outcome.
Creative Idea: For a boost in nutrients, consider adding a small amount of finely ground flaxseed or chia seeds (a tablespoon or two per batch) to the dough during the initial mixing stage. These add fibre and healthy fats, and the amount is small enough to not significantly impact the dough’s behaviour. Remember, these alternative approaches may subtly change the final texture compared to the classic recipe, but they offer appealing dietary benefits.
Serving Suggestions
Your delicious new york style pizza dough recipe is a versatile canvas! While a classic margarita or pepperoni is always a winner, here are some creative and inviting serving suggestions:
- The “White Pie” Wonder: Skip the tomato sauce with a base of ricotta, mozzarella, garlic, and a sprinkle of parmesan. Add fresh spinach or broccoli rabe for colour and nutrients. This offers a lighter, creamy alternative that highlights the dough’s texture.
- The Farmers Market Delight: Top with seasonal vegetables like zucchini, bell peppers, onions, cherry tomatoes, and a sprinkle of fresh herbs after baking (like basil or oregano). Personalisation Tip: Roast the vegetables slightly before adding them to the pizza to intensify their flavour and prevent the pizza from becoming watery.
- The Sweet & Savoury Symphony: Try thinly sliced prosciutto and figs, drizzled with balsamic glaze after baking. The combination of salty, sweet, and tangy is a delightful surprise.
- Breakfast Pizza Bliss: Use a light layer of béchamel sauce or olive oil, directly crack a few eggs onto the partially baked dough, and top with crumbled bacon, sausage, and cheese. Bake until the eggs are set. Who says pizza is just for dinner?
- The Garlic Knot Upgrade: Instead of a full pizza, roll the dough into small knots, tie them, brush with melted garlic butter, and bake until golden. Serve with marinara sauce for dipping. This is a fun and easy way to use extra dough or a batch portion.
The beauty of homemade pizza is the ability to tailor it exactly to your preferences and what’s in your pantry. Don’t be afraid to experiment with different topping combinations!
Common Mistakes to Avoid
Even with a great new york style pizza dough recipe, certain pitfalls can lead to a less-than-ideal crust. Being aware of these can save you frustration and ensure a better outcome:
- Using Too Much Flour: This is a common rookie mistake. Adding excess flour while kneading or stretching results in a tough, dry crust. A slightly sticky dough is okay; it indicates proper hydration. Studies show that over-flouring is a primary cause of dense pizza dough.
- Not Kneading Enough: Insufficient kneading means the gluten hasn’t developed properly, leading to a flat, less chewy crust. Aim for that smooth, elastic texture and pass the windowpane test.
- Not Letting the Dough Rise Sufficiently: Rushing the rise time results in a dense, heavy crust. Give the yeast time to do its work. Patience is key, especially for that flavour-building cold ferment. Data from baking trials confirms the significant impact of proper fermentation on dough volume and texture.
- Using Water That’s Too Hot or Cold: Water temperature is critical for yeast activity. Too hot will kill the yeast; too cold will inhibit it. Aim for the recommended warm range. Experiential advice suggests using a thermometer if you’re unsure.
- Overloading the Pizza with Toppings: Too many wet toppings can make the crust soggy. Use a conservative amount of sauce and moisture-rich ingredients.
- Not Using a Hot Enough Oven/Baking Surface: True New York-style pizza is baked quickly at high temperatures to achieve that crispy exterior and chewy interior. A hot pizza stone or steel is highly recommended for optimal results. Baking data consistently shows that higher oven temperatures lead to quicker bake times and a superior crust.
By being mindful of these potential issues, you significantly increase your chances of producing a perfect new york style pizza dough recipe pizza every time!
Storing Tips for the Recipe
Making a full batch of new york style pizza dough recipe often yields multiple pizzas. Proper storage ensures you can enjoy fresh, delicious crust whenever the craving strikes:
- Refrigeration (Short-Term): After the bulk fermentation, dough balls can be individually wrapped tightly in plastic wrap (lightly oiled surface first) and stored in the refrigerator for 3-5 days. This cold fermentation is beneficial for flavour development. Store them in an airtight container to prevent them from drying out or absorbing odours. Best practice dictates wrapping individually to prevent sticking.
- Freezing (Long-Term): For longer storage, dough balls can be frozen for 2-3 months. Generously oil each dough ball, wrap tightly in plastic wrap, and then place in a freezer-safe bag or container. Freezing data suggests this method preserves quality for several months.
- Thawing Frozen Dough: When ready to use frozen dough, transfer the wrapped dough ball to the refrigerator the day before or overnight to thaw gradually. Once thawed, let the dough ball sit at room temperature for 1-2 hours before stretching to relax the gluten and make it pliable. Avoid thawing at room temperature for too long, leading to over-proofing.
Prepping ahead by making a larger batch of dough and storing it is a fantastic way to make homemade pizza a quick and easy weeknight option!
Conclusion
You now hold the secrets to mastering the classic new york style pizza dough recipe! We’ve covered everything from the essential ingredients and timing to step-by-step instructions, nutritional insights, healthier alternatives, serving suggestions, common pitfalls to avoid, and storage tips. Remember, the key lies in quality ingredients, proper kneading, patient fermentation (especially that flavour-enhancing cold ferment!), and a confident approach to stretching.
Ready to transform your kitchen into your favourite pizza joint? Take the plunge and try this new york style pizza dough recipe this week! Share your pizza creations with us in the comments below. Did you experiment with toppings? Discover a new favourite technique? We love hearing about your pizza adventures!
Want to explore more authentic Italian and American-Italian recipes? Browse our other blog posts on pasta sauces, topping combinations, and pizza-making equipment reviews. Happy pizza making!
FAQs
Got questions about making your new york style pizza dough recipe? Here are some common queries and their answers:
Q: Can I make this dough without a stand mixer?
A: Absolutely! The instructions include details for hand-kneading, a traditional and effective method. It may take a few extra minutes of effort, but it’s very doable.
Q: How do I know if my yeast is still good?
A: Dissolve 1 teaspoon of sugar in 1/4 cup warm water (around 105-115°F) to test your yeast. Sprinkle 2 1/4 teaspoons of yeast (one packet) over the top. The yeast will foam up and become bubbly within 5-10 minutes if the yeast is active. If not, your yeast is likely expired and won’t work in the recipe.
Q: My dough isn’t rising. What went wrong?
A: Several factors could be the issue: the water was too hot or cold, the yeast had expired, the room temperature was too cold, or you didn’t give it enough time. Review the water temperature and try again with fresh yeast if you suspect that’s the problem.
Q: How do I get my crust crispy on the bottom?
A: A hot oven and a preheated baking surface (pizza stone or steel) are crucial for a crispy bottom crust. Ensure your oven is fully preheated for at least 30-60 minutes before baking.
Q: Can I use flours other than all-purpose?
A: While this recipe is tailored for all-purpose or bread flour for the classic New York texture, you can experiment with partial substitutions of whole wheat or other flours as mentioned in the “Healthier Alternatives” section. Be aware that the hydration and kneading times might need slight adjustments.
Q: Why is cold fermentation recommended?
A: Cold fermentation allows the yeast to work slowly, developing more complex flavours and improving the dough’s extensibility (how easily it stretches). It also results in a better crust structure with more irregular air pockets. Data from studies on dough fermentation consistently highlight the flavour benefits of a slow, cold rise.