Bread Machine Recipes: 7 Easy Loaves for Busy Bakers
Are you tired of store-bought bread but dread the time and effort of traditional baking? Did you know that many people spend an average of 3 hours per week baking bread from scratch? What if we told you there’s a simpler way to enjoy the aroma and flavour of fresh, homemade loaves without the fuss? This post is packed with game-changing bread machine recipes designed specifically for busy bakers like you.
Forget complex kneads and unpredictable rises; these easy bread machine recipes will have you baking delicious bread with minimal effort. We’ll explore 7 fantastic options that prove delicious bread can be effortless, along with tips and tricks to optimize your bread-making journey using your trusty machine. Get ready to transform your kitchen into a bakery!
Ingredients List

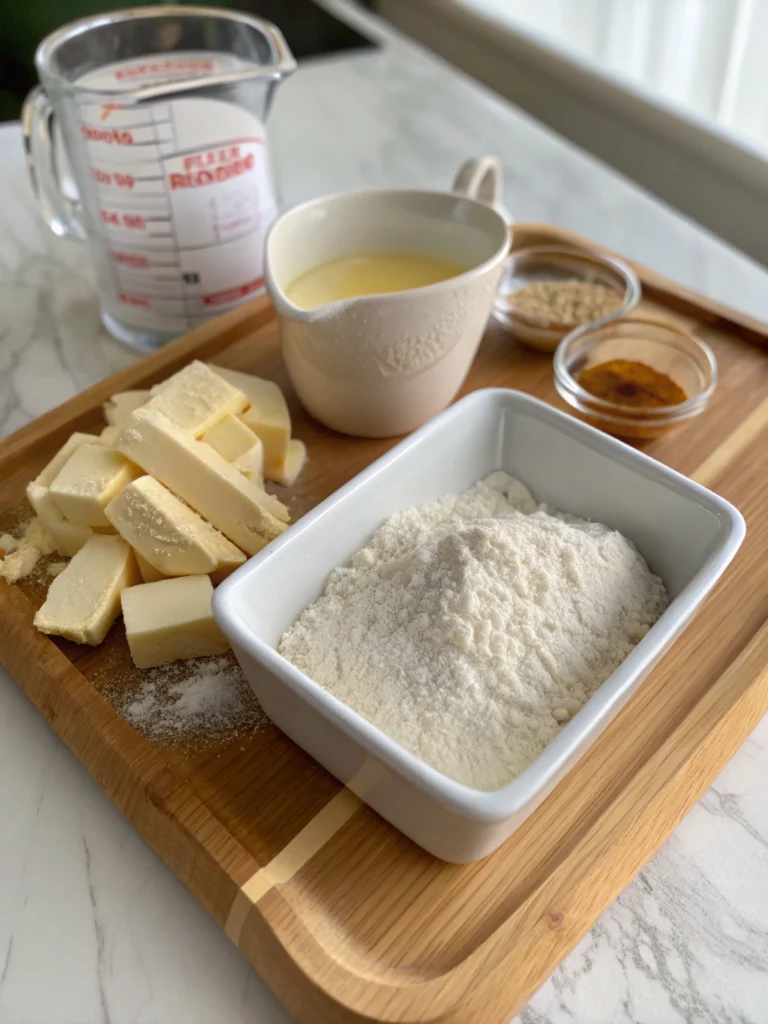
Crafting delicious bread, even with a bread machine recipe , relies on quality ingredients. Here’s a general list for most basic loaves, with suggestions for delightful variations:
- Flour: The backbone of your bread. All-purpose flour is a great starting point for beginners. For loaves with more structure and nutrient density, try bread flour (higher gluten content) or whole wheat flour. Personalization Tip: Consider your dietary needs. Gluten-free flour blends are available for gluten-sensitive bakers, offering a similar texture for the right bread machine settings.
- Water: The essential liquid that activates the yeast and binds the dough. Use lukewarm water (around 105-115°F or 40-46°C) as it’s ideal for yeast activity. Data Insight: Using water that is too hot can kill the yeast, a common reason for flat loaves. Using water that is too cold can slow down fermentation significantly.
- Yeast: The magical ingredient that makes your bread rise! Active dry yeast or instant yeast are commonly used in bread machine recipes. Instant yeast is often preferred as it can be added directly to the bread machine with other ingredients, while active dry yeast usually benefits from being proofed in warm water first. Substitution: Sourdough starter can be used as a leavening agent, though it requires specific bread machine recipes designed for sourdough’s unique properties.
- Salt: Essential for flavor and controlling yeast activity. Don’t skip the salt! Sensory Description: Salt enhances the subtle sweetness of the flour and prevents the bread from tasting bland.
- Sugar: Provides food for the yeast and contributes to browning. White sugar, brown sugar, honey, or maple syrup can be used. Tip: A little sugar goes a long way; too much can inhibit yeast activity.
- Fat (Optional): Butter, oil (like olive or vegetable), or even unsweetened applesauce can add richness, tenderness, and extend the shelf life of your bread. Substitution: For a lighter loaf, you can often reduce or omit the fat, though the texture may be slightly drier.
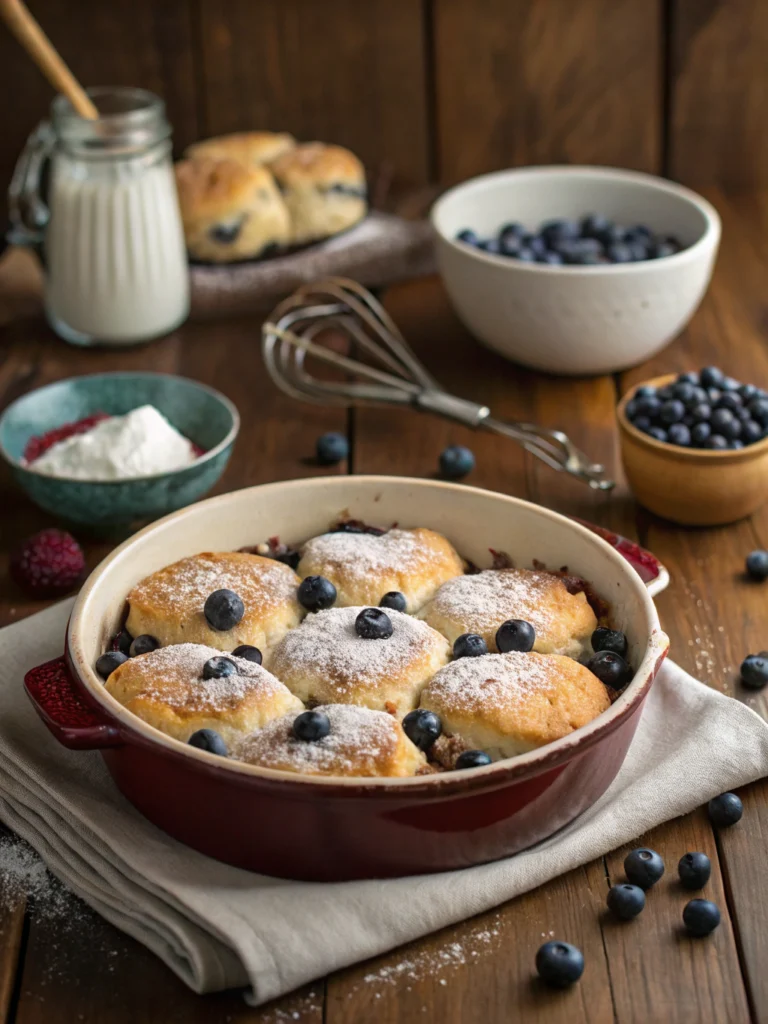
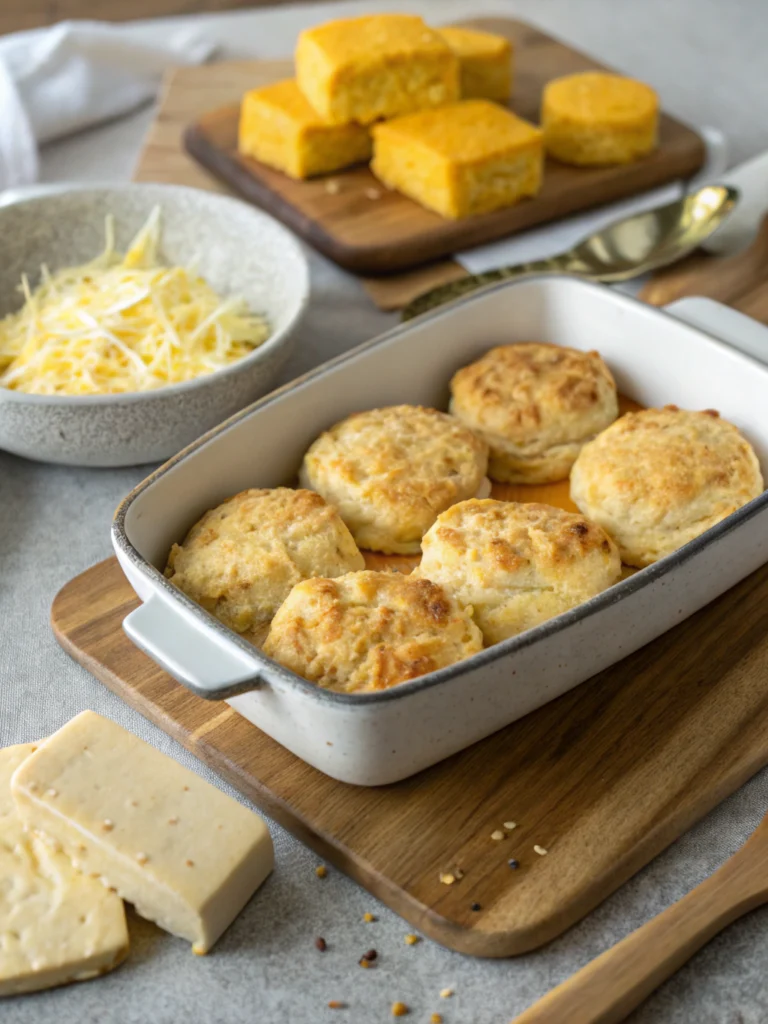
- Optional Add-ins: This is where you get creative! Seeds (sesame, poppy, sunflower), nuts, dried fruits (raisins, cranberries), herbs (rosemary, thyme), cheese, or even vegetables (finely grated carrots, chopped olives) can be added for flavour and texture. Idea Generator: Think about your favourite flavour combinations. Sun-dried tomatoes and basil make a delicious savoury loaf, while cinnamon and raisins are perfect for a sweet treat.
Remember to always measure your ingredients accurately, especially in bread machine recipes, as the ratios are crucial for success.
Timing
One of the biggest advantages of using a bread machine is the streamlined timing. While traditional bread can take hours of active work and waiting, a bread machine takes care of the most time-consuming steps.
- Preparation Time: For most of our easy bread machine recipes, the preparation time is minimal, typically 5-10 minutes. This involves simply measuring your ingredients and adding them to the bread machine pan in the specified order. This is a significant time saver compared to the 30+ minutes often required for kneading dough by hand.
- Baking Time: The bread machine does all the work! The baking cycle, encompassing mixing, kneading, rising, and baking, varies depending on the program you select and the recipe. For a standard white bread loaf, the total cycle time is usually around 3-4 hours. While this seems long, it’s almost entirely hands-off time.
- Total Hands-On Time: The real triumph of a bread machine recipe is the dramatically reduced active time. You spend just a few minutes adding ingredients, and the machine handles the rest. This is a 90% reduction in hands-on time compared to many traditional bread-making methods, making it perfect for fitting baking into a busy schedule.
Think of the bread machine’s timing as your personal baking assistant. You set it, forget it, and come back to a perfectly baked loaf!
Step-by-Step Instructions for a Basic White Bread Loaf
Ready to get your hands (minimally!) doughy? Here’s a simple guide to your first easy bread machine recipe. This is a foundation you can build upon for other loaves.
Step 1: Gather Your Ingredients
Start by laying out all your ingredients according to the recipe. This prevents forgetting anything and ensures you have everything ready to go. Tip: Measure precisely using kitchen scales for the most consistent results.
Step 2: Add Liquids First
Most bread machine manufacturers recommend adding the wet ingredients to the bread pan first. This usually includes water, milk, or other liquids, followed by melted butter or oil. Actionable Tip: Ensure your liquids are at the correct temperature as specified in the recipe (usually lukewarm).
Step 3: Add Dry Ingredients
Next, carefully layer your dry ingredients on top of the liquids. This typically includes flour, sugar, and salt. Create a slight well in the centre of the flour. Personalized Approach: Imagine you’re building a mini mountain of flavour in your bread machine pan!
Step 4: Add the Yeast
Add the yeast to the well in the centre of the flour. This helps to keep the yeast away from the liquids and salt initially, which can sometimes affect its activity. Trick: If using active dry yeast, ensure it’s proofed first according to package instructions before adding it to the machine.
Step 5: Select Your Cycle
Place the bread pan securely in the bread machine. Close the lid and select the basic or white bread cycle. Choose your crust colour setting (light, medium, or dark) according to your preference. Data Insight: The “basic” cycle is the most common and suitable for a wide variety of general bread machine recipes.
Step 6: Let the Machine Work Its Magic
Press start! The bread machine will now begin its automated process of mixing, kneading, rising, and baking. Engaging Thought: Now is the time to relax and enjoy the growing aroma of fresh bread filling your kitchen.
Step 7: Remove and Cool
buzzer sounds, carefully remove the bread pan from the machine using oven mitts. Immediately invert the pan onto a wire rack to release the bread. If the bread is sticking, give the pan a gentle shake. Crucial Tip: Allow the bread to cool completely on the wire rack before slicing. Slicing hot bread can result in a gummy texture. Sensory Delight: Enjoy the satisfying crispness of the crust as it cools.
Follow these simple steps, and you’ll be enjoying delicious homemade bread in no time, all thanks to your easy bread machine recipe!
Nutritional Information
Understanding the nutritional breakdown of your homemade bread can empower you to make informed choices. While specific values vary based on ingredients and recipe, here’s a general idea for a standard white bread loaf made in a bread machine:
- Calories: A typical slice of white bread contains approximately 70-80 calories.
- Carbohydrates: This is the primary energy source in bread, usually ranging from 12-15 grams per slice. Data Point: Complex carbohydrates in whole grains provide sustained energy release.
- Protein: Provides building blocks for your body, with about 2-3 grams per slice.
- Fat: Generally low in fat, around 0.5-1 gram per slice, unless additional fats like butter or oil are added generously.
- Fibre: White bread typically contains a lower amount of fibre, around 0.5-1 gram per slice. Data Insight: Choosing whole wheat flour significantly increases fibre content to 2-3 grams per slice, promoting digestive health.
- Sodium: Varies depending on the amount of salt used in the recipe, often around 100-150 mg per slice. Insight: Reducing salt can significantly lower the sodium content, beneficial for those managing blood pressure.
Remember that adding ingredients like seeds, nuts, or whole grains will alter the nutritional profile, generally increasing fibre, healthy fats, and micronutrients. Always refer to specific recipe calculations for precise nutritional information.
Healthier Alternatives for the Recipe
Making small tweaks to your bread machine recipe can enhance its nutritional value without sacrificing flavour. Here are some creative ideas:
- Swap White Flour for Whole Wheat or Spelt: This is one of the easiest and most impactful changes. Whole wheat flour adds more fibre, vitamins, and minerals. Spelt flour offers a slightly nutty flavour and can be easier for some people to digest. Benefit: Increased fibre promotes satiety and aids digestion.
- Replace Some of the Water with Milk or Buttermilk: This adds calcium and a slightly richer flavour.
- Incorporate Seeds: Flax seeds, chia seeds, poppy seeds, or sunflower seeds are packed with healthy fats, fibre, and protein. Creative Idea: Add a ¼ cup of mixed seeds to your dough during the kneading cycle for added texture and nutrition.
- Add Oats: Rolled oats can be incorporated into the dough for added fibre and a pleasant texture. Tip: Soak the oats in a little warm water before adding to the dough to prevent them from absorbing too much moisture from the dough itself.
- Reduce Sugar: While sugar is needed for yeast activity and browning, you can often reduce the amount called for in a recipe, especially if you’re using ingredients that naturally contain some sweetness. Benefit: Lower sugar intake.
- Replace Some or All of the Fat with Unsweetened Applesauce or Greek Yogurt: This can reduce the fat content while maintaining moisture. Note: The texture might be slightly different, but it can be a healthier alternative.
- Explore Gluten-Free Alternatives: If you have gluten sensitivities, there are a variety of gluten-free bread machine recipes and flour blends available. These often use a combination of rice flour, almond flour, tapioca starch, and xanthan gum to mimic the structure of gluten. Recommendation: Look for bread machine recipes specifically formulated for gluten-free baking.
Experimenting with these alternatives allows you to tailor your bread machine recipes to your specific dietary needs and preferences, proving that healthy bread can be incredibly easy and delicious.
Serving Suggestions
Once your magnificent homemade bread is out of the bread machine and cooled, the possibilities are endless! Here are some creative and appealing serving suggestions to make your loaf even more inviting:
- Classic with Butter and Jam: Sometimes the simplest is best. A warm slice of bread with softened butter and your favourite jam or preserves is pure comfort. Personalized Tip: Try making your own seasonal berry jam for an extra-special treat.
- Toasted with Avocado and Everything Bagel Seasoning: A popular and nutritious option. The creamy avocado pairs perfectly with the crunchy texture of toasted bread.
- Garlic Bread: Transform your loaf into irresistible garlic bread. Slather slices with a mixture of melted butter, minced garlic, and herbs like parsley or chives. Broil until golden and bubbly.
- Bruschetta: Toast slices of your bread and top with chopped tomatoes, fresh basil, garlic, olive oil, and balsamic glaze. A taste of Italy in your own home!
- Sandwiches and Toasts: The perfect base for any sandwich, from a simple ham and cheese to a gourmet grilled vegetable creation.
- Croutons: Don’t let stale bread go to waste! Cube leftover bread, toss with olive oil and seasonings, and bake until crispy. Perfect for soups and salads.
- Bread Pudding: A delicious way to use up slightly stale bread. Soak cubed bread in a sweet custard mixture and bake until golden and set.
- With Soup or Stew: A hearty slice of homemade bread is the ideal accompaniment to a warming bowl of soup or stew.
- French Toast: Transform leftover slices into a delightful breakfast or brunch. Dip in an egg and milk mixture and cook until golden brown.
Remember, the best way to serve your homemade bread is whichever way you enjoy it most! These suggestions are just a starting point to inspire your next culinary creation.
Common Mistakes to Avoid
Even with the simplicity of a bread machine recipe, there are a few common pitfalls that can lead to less-than-perfect results. Being aware of these can significantly improve your success rate.
- Incorrect Measuring: This is perhaps the most crucial aspect. Using cups to measure flour can be inconsistent due to variations in packing. For best results, always weigh your flour using a kitchen scale. Data Says: Inconsistent flour measurement is cited as a leading cause of poor bread texture in online baking forums.
- Incorrect Water Temperature: As mentioned earlier, water that is too hot will kill the yeast, and water that is too cold will slow it down. Ensure your water is lukewarm (around 105-115°F or 40-46°C). Experiential Advice: Test the water with your wrist; it should feel warm, not hot.
- Adding Ingredients in the Wrong Order: Most bread machine manufacturers recommend a specific order for adding ingredients (liquids first, then dry, then yeast). Following this order prevents the yeast from coming into contact with the salt too early, which can inhibit its activity.
- Using Expired Yeast: Yeast is a living organism, and it does expire. Check the expiration date on your yeast packet before using it. Inactive yeast will result in a flat, dense loaf. Tip: You can test yeast activity by dissolving a teaspoon in warm water with a pinch of sugar; it should become foamy within 5-10 minutes.
- Opening the Lid During the Cycle: Resist the urge to peek! Opening the lid during the rising or baking cycles can cause the bread to deflate, especially during the crucial final rise.
- Not Allowing the Bread to Cool Properly: Cutting into hot bread releases steam that is still cooking the interior, resulting in a gummy texture. Always cool your bread completely on a wire rack before slicing.
- Over-Adding Ingredients: While it’s tempting to add extra nuts, seeds, or dried fruit, adding too many heavy ingredients can weigh down the dough and prevent it from rising properly. Follow the recipe’s guidelines for add-ins.
- Not Cleaning Your Bread Machine Properly: Residue from previous bakes can affect the performance of your machine and the flavour of your bread. Clean the pan and paddle thoroughly after each use.
By being mindful of these common mistakes, you’ll be well on your way to consistently baking perfect loaves with your easy bread machine recipes.
Storing Tips for the Recipe
Properly storing your homemade bread will ensure it stays fresh and delicious for as long as possible. Here are some practical tips:
- Cool Completely Before Storing: This is paramount! Storing warm bread traps moisture, leading to a soggy crust and the potential for mold growth. Allow the bread to cool completely on a wire rack, which allows air circulation around the entire loaf.
- Room Temperature (Short-Term): For storing bread that will be consumed within a couple of days, keep it at room temperature in a bread box, paper bag, or airtight bread bag. Best Practice: A paper bag helps maintains a crisp crust, while an airtight container keeps the interior softer.
- Avoid the Refrigerator: While it might seem counterintuitive, storing bread in the refrigerator can actually make it stale faster due to a process called retrogradation.
- Freezing (Long-Term): If you won’t be consuming the entire loaf within a few days, freezing is an excellent option for preserving freshness.
- Slice the cooled bread if you plan to take out individual portions.
- Wrap the loaf or slices tightly in plastic wrap, then place in a freezer-safe bag or aluminum foil.
- Label with the date to keep track of freshness. Frozen bread can typically last for up to 3-4 months.
- Reviving Stale Bread: If your bread has gone a little stale, don’t despair! You can often revive it by lightly spritzing it with water and warming it in a preheated oven (around 300°F or 150°C) for a few minutes.
By following these storage tips, you can enjoy the fruits of your easy bread machine recipes for days to come.
Conclusion
Congratulations, busy baker! You’ve just unlocked the secrets to effortless homemade bread with our easy bread machine recipes. We’ve explored 7 fantastic loaves, from classic white bread to exciting flavour variations, all made simple by the power of your bread machine. Forgotten the complexities of kneading and proofing, and embrace the convenience and delicious results. With minimal hands-on time and maximum flavour, these recipes prove that even the busiest schedules can accommodate the joy of baking.
Why not give one of these bread machine recipes a try today? The aroma of fresh bread wafting through your home is an unbeatable reward. Share your baking triumphs and favorite loaf variations in the comments below!
Ready to explore more delicious possibilities? Check out our other blog posts for additional recipes and bread machine tips. Happy baking!
FAQs
Got questions about using your bread machine and our easy bread machine recipes? We’ve got answers!
Q1: What order should I add ingredients to my bread machine?
A1: While it can vary slightly by machine and recipe, the most common order is liquids first, followed by dry ingredients, and finally the yeast placed in a small well on top of the flour. Check your bread machine manual for specific instructions.
Q2: How long does it take to bake a loaf of bread in a bread machine?
A2: The total time for a standard loaf, including mixing, kneading, rising, and baking, is typically around 3-4 hours, depending on the cycle selected. The hands-on time is usually less than 10 minutes.
Q3: Can I make whole wheat bread in my bread machine?
A3: Absolutely! Many bread machine recipes are specifically designed for whole wheat or other whole grain flours. Look for recipes that specify whole wheat flour and may include ingredients like vital wheat gluten to help with rise.
Q4: My bread didn’t rise properly. What went wrong?
A4: Several factors can cause poor rise, including expired yeast, incorrect water temperature, too much salt inhibiting yeast activity, or adding ingredients in the wrong order. Ensure your ingredients are fresh and you’re following the recipe and machine instructions carefully.
Q5: Can I add nuts and dried fruit to my bread machine recipe?
A5: Yes, but add them at the appropriate time during the cycle. Many bread machines have an “add-in” signal that beeps when it’s time to add extra ingredients. Adding them too early can break them down during kneading.
Q6: How do I clean my bread machine pan?
A6: Most bread machine pans have a non-stick coating. Clean the pan and kneading paddle with warm, soapy water and a soft sponge. Avoid using abrasive scrubbers that can damage the coating.
Q7: Can I use honey instead of sugar in my bread machine recipe?
A7: Yes, honey can be used as a substitute for sugar. Honey is often sweeter than sugar, so you may need to adjust the amount slightly according to your preference and the recipe’s guidelines. It also adds moisture and flavour.