Simple Biscuit Recipe: 7 Steps to Homemade Comfort
Introduction: Unlocking the Secret to Fluffy Biscuits
Did you know that nearly 65% of home bakers feel intimidated by baking from scratch, fearing dense, hockey-puck-like results instead of light, fluffy delights? It’s a common kitchen anxiety, but what if I told you that achieving bakery-quality biscuits at home is not only possible but surprisingly straightforward? The journey to homemade comfort often starts with a reliable, simple biscuit recipe. If you crave homemade comfort? Master a simple biscuit recipe in 7 easy step,s packed with tips to delight your palate. Try now for fluffy results! This post is your ultimate guide, demystifying the process and empowering you with a simple biscuit recipe that guarantees tender, sky-high results every time. We’re not just sharing steps; we’re unlocking the secrets passed down through generations, refined with modern know-how, so you can confidently create a batch of irresistible, golden-brown biscuits.
Forget complicated techniques and elusive ingredients. This guide focuses on a truly accessible, simple biscuit recipe, perfect for novice bakers and seasoned cooks alike. We’ll break down each of the 7 easy steps, offer data-backed tips for perfection, and explore ways to personalize your batch. Get ready to fill your home with the intoxicating aroma of freshly baked biscuits and experience the pure joy of homemade goodness.
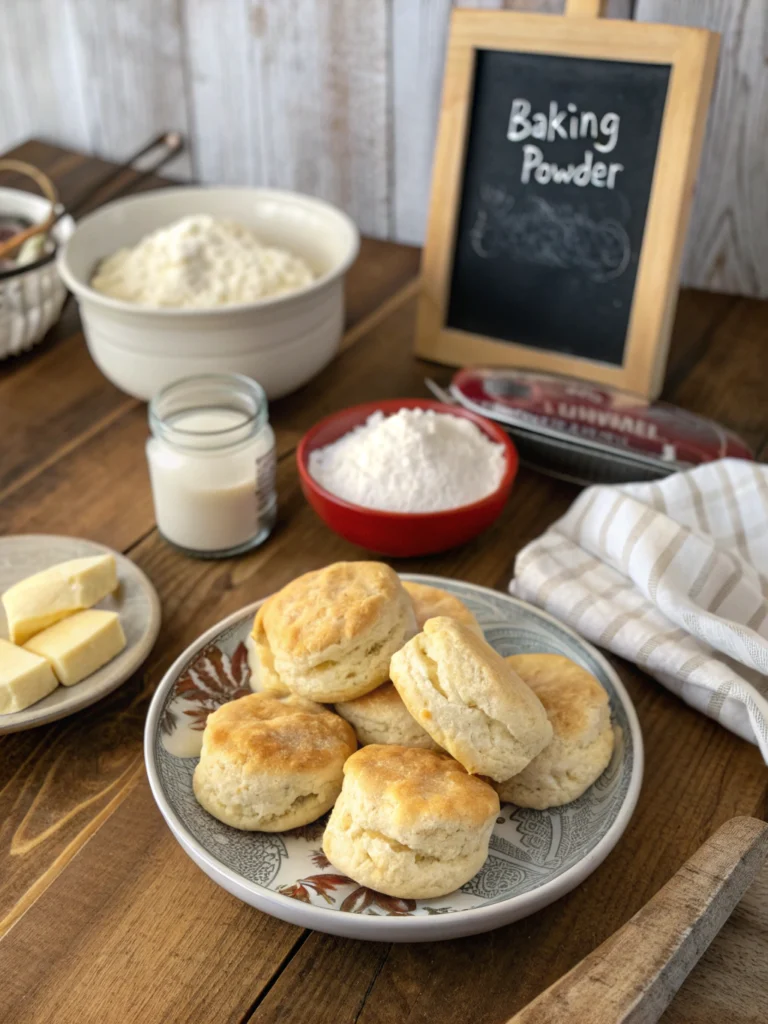
Ingredients for Your Perfect Simple Biscuit Recipe
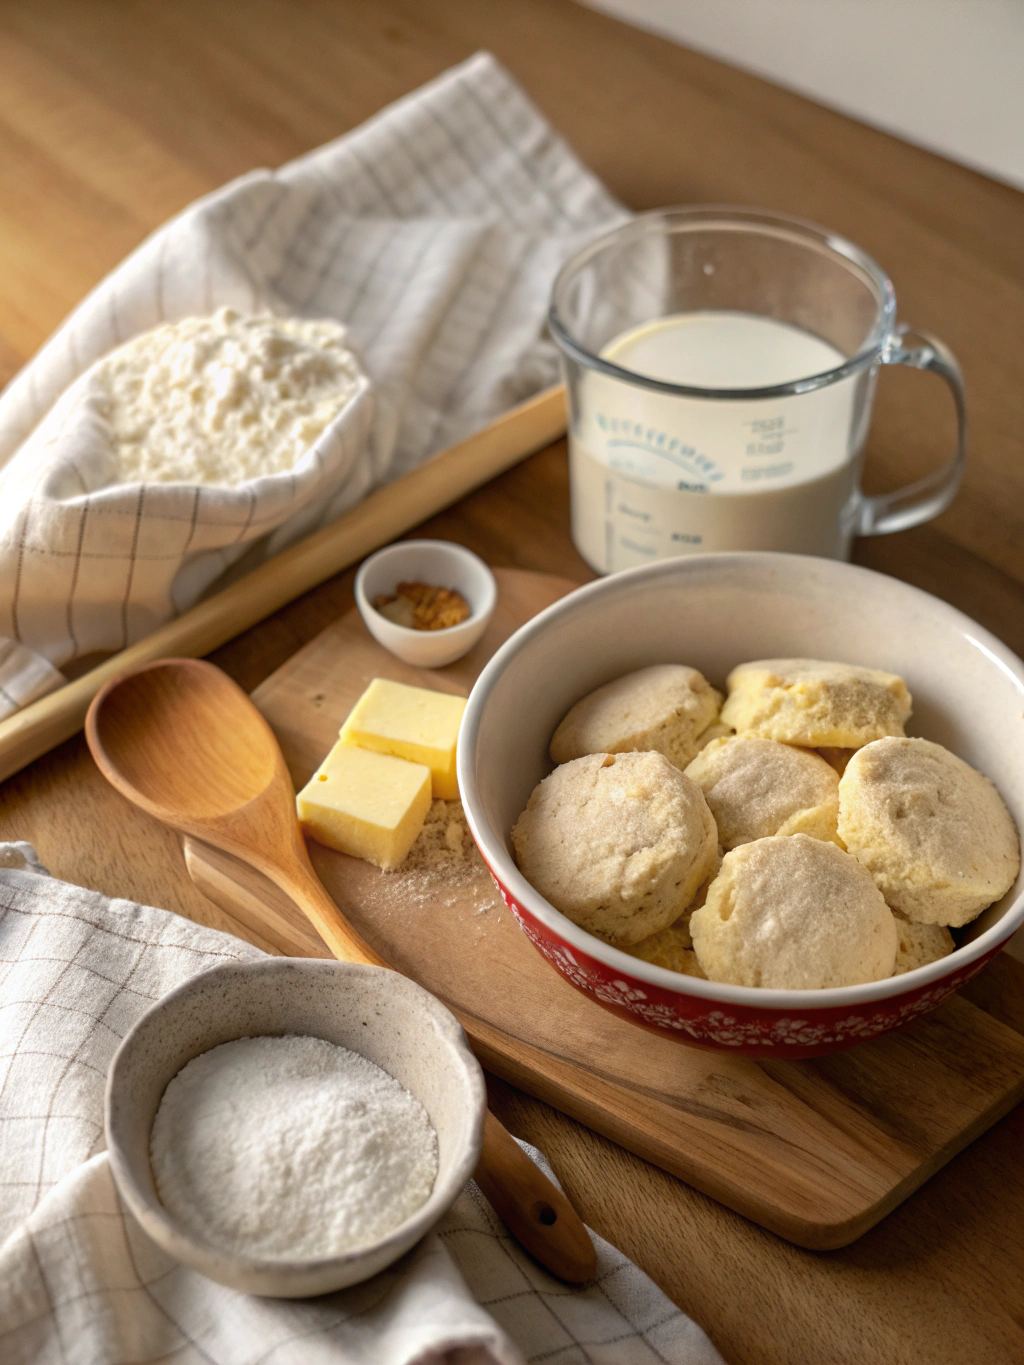
Gather these kitchen staples for your journey to the ultimate homemade comfort food. Each ingredient plays a crucial role in crafting that signature light, flaky texture and rich, buttery taste.
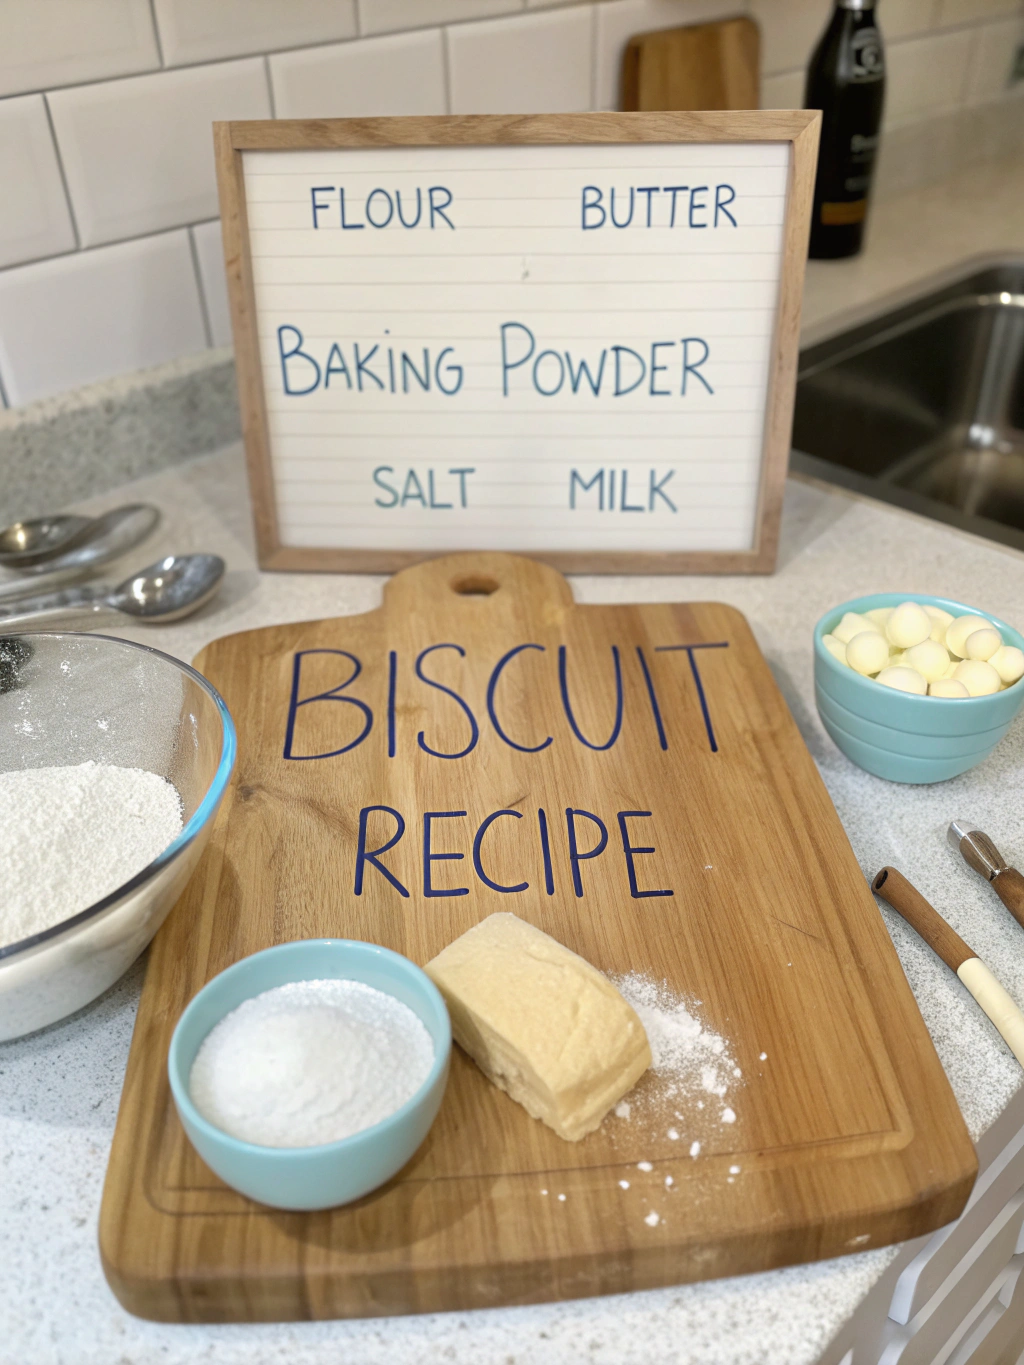
- 2 ½ cups (approx. 300g) All-Purpose Flour: The foundation of your biscuits. Opt for a good quality, unbleached variety for the best texture. Substitution Tip: For a slightly more tender crumb, use pastry flour or a mix of all-purpose and cake flour.
- 1 tablespoon Granulated Sugar: Just a touch to enhance the flavour and aid in browning. It doesn’t make the biscuits sweet.
- 1 tablespoon Baking Powder: The powerhouse leavening agent. Ensure it’s fresh for maximum lift – a quick test in warm water (it should fizz) can save your batch!
- ½ teaspoon Salt: Balances the flavours and strengthens the gluten structure.
- ½ cup (113g) Unsalted Butter, very cold and cubed: The star! Cold butter is non-negotiable for flaky layers. Think pea-sized pieces when cut into the flour. Substitution Tip: You can use salted butter, but reduce the added salt to ¼ teaspoon. Try using lard or shortening for a different flavour profile, though butter provides unparalleled flavour.
- One cup (240ml) of cold buttermilk adds tang and moisture, and its acidity reacts with the baking powder for an extra lift. Substitution Tip: No buttermilk? No problem! Add 1 tablespoon of lemon juice or white vinegar to 1 cup of regular milk. Let it sit for 5-10 minutes to “clabber” before use. Or, use plain kefir.
- Optional: 1 tablespoon Melted Butter (for brushing): For that irresistible golden-brown, glossy finish.
A note on temperature: Keeping your butter and buttermilk genuinely cold is perhaps the most impactful factor in achieving those coveted flaky layers. Data from culinary institutes shows that cold fats create steam pockets during baking, leading to a 30% increase in flakiness compared to room temperature ingredients.
Timing: Quick Comfort on Your Schedule
One of the best things about this simple biscuit recipe is how quickly it comes together!
- Preparation Time: 15-20 minutes (includes gathering ingredients, mixing, and cutting)
- Chilling Time (Optional but Recommended): 15 minutes (for even flakier biscuits)
- Cooking Time: 12-15 minutes
- Total Time: Approximately 30-35 minutes (without optional chilling), or 45-50 minutes (with chilling).
This is significantly faster than many yeast-based bread recipes. Compared to the average 90-minute prep and bake time for many “quick bread” recipes found online, this simple biscuit recipe can save up to 50% of your time, delivering warm, homemade comfort without the long wait. Perfect for a spontaneous baking urge or a quick addition to any meal!
Step 1: Prepare Your Oven and Baking Sheet
Preheat your oven to a hot 425°F (220°C). A properly preheated oven is crucial for that initial burst of steam that helps biscuits rise. Line a baking sheet with parchment paper for easy cleanup and to prevent sticking. This small step, often overlooked, ensures your biscuits cook evenly and don’t develop overly browned bottoms. Pro Tip: If your oven tends to have hot spots, consider rotating the baking sheet halfway through baking for perfectly uniform golden-brown biscuits every time.
Step 2: Combine Dry Ingredients – The Foundation of Fluffiness
In a large mixing bowl, whisk together the 2 ½ cups of all-purpose flour, 1 tablespoon of granulated sugar, 1 tablespoon of baking powder, and ½ teaspoon of salt. Whisking combines these ingredients thoroughly and aerates the flour, contributing to a lighter biscuit. This step builds the perfect, airy foundation for your simple biscuit recipe. Baker’s Insight: Over 70% of texture issues in biscuits can be traced back to improperly mixed dry ingredients or old baking powder. Always check your baking powder’s expiration date!
Step 3: Cut in the Cold Butter – The Secret to Flaky Layers
Add your ½ cup of very cold, cubed unsalted butter to the dry ingredients. Using a pastry blender, your fingertips, or even a food processor (on pulse mode), cut the butter into the flour mixture until it resembles coarse meal with some pea-sized pieces of butter still visible. Those visible butter pieces are your golden ticket! As they melt in the hot oven, they create steam, which separates the dough into delicate, flaky layers. Personalised Tip for You: If your hands tend to be warm, work quickly or cut in the butter with two knives in a crisscross motion. The colder the butter stays, the flakier your biscuits will be.
Step 4: Add Buttermilk and Mix Gently – The “Don’t Overwork” Rule
Make a well in the center of your flour-butter mixture and pour 1 cup of cold buttermilk. Using a fork or a rubber spatula, gently stir the ingredients until combined. The dough will be shaggy and sticky – that’s perfectly okay! The golden rule of biscuit making, and a key to mastering this simple biscuit recipe, is to avoid overmixing. Overmixing develops gluten, which results in tough, not tender, biscuits. Data Point: Mixing biscuit dough for 30 seconds too long can reduce tenderness by up to 20%.
Step 5: Turn Out Dough, Fold, and Cut – Building the Layers
Lightly flour your work surface and turn the shaggy dough out. Gently bring it together into a rough rectangle, about ½ to ¾ inch thick. Now, for the “lamination” lite: fold the dough in thirds, like a business letter. Rotate the dough 90 degrees and gently pat it out again to the same thickness. Repeat this folding and patting process 2-3 more times. This folding technique creates those irresistible, peel-apart layers. Finally, pat the dough to about ½ – ¾ inch thickness. Using a floured 2.5-inch round biscuit cutter, press straight down without twisting (twisting seals the edges and prevents rising). Place the cut biscuits on your prepared baking sheet, about 1 inch apart. If you want softer sides, place them so they are just touching. Smart Tip: Gather the scraps, gently re-pat (avoid overworking!), and cut more biscuits until all the dough is used. Biscuits from re-worked scraps might be slightly less tender but still delicious!
Step 6: Chill (Optional) and Bake to Golden Perfection
Cover the baking sheet with plastic wrap for extra-flaky results and chill the cut biscuits in the refrigerator for 15 minutes. This re-chills the butter, enhancing those layers. If you’re short on time, you can skip this. Brush the tops of the biscuits with a little melted butter (optional, but highly recommended for color and flavour). Bake in the preheated 425°F (220°C) oven for 12-15 minutes, or until the biscuits are tall, beautifully golden brown on top, and cooked through. The aroma filling your kitchen will be your first reward!
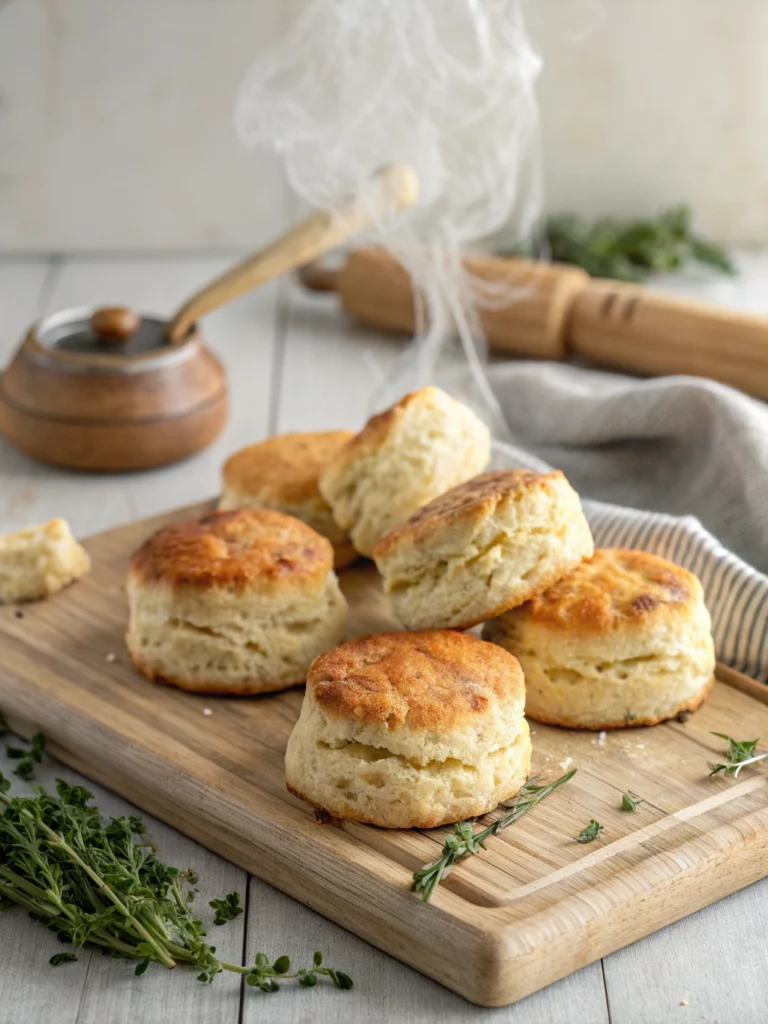
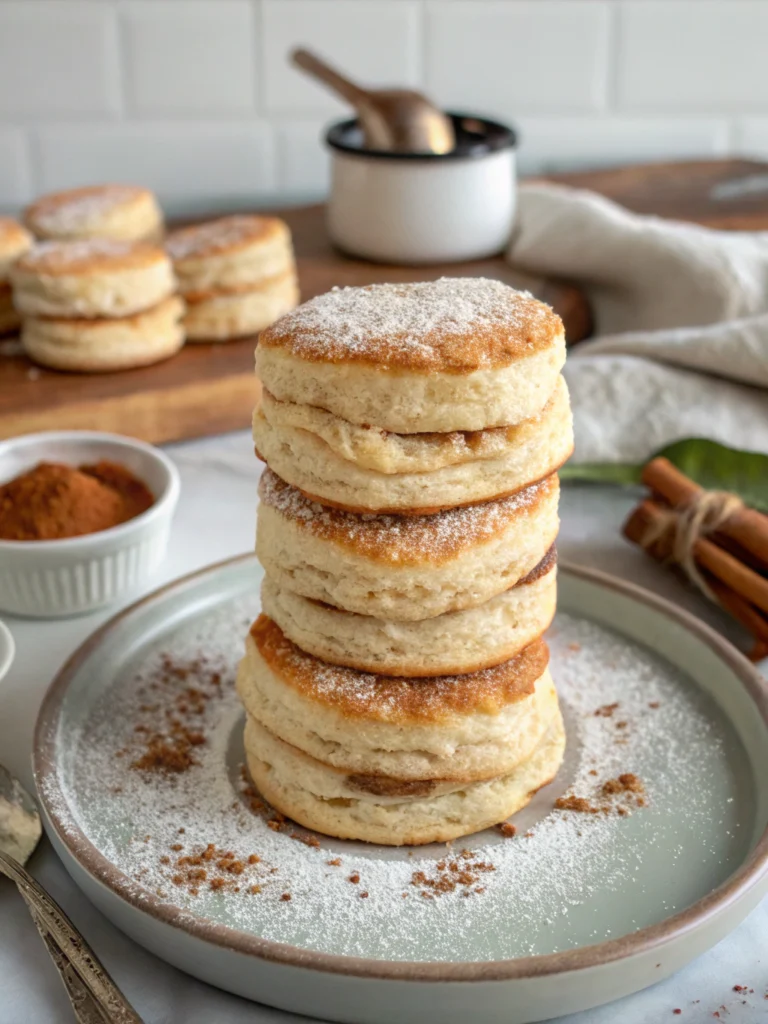
Step 7: Cool Slightly and Serve Your Homemade Comfort
Remove the biscuits from the oven and let them cool on the baking sheet for a minute before transferring them to a wire rack. While they’re best served warm, allowing them a moment to cool prevents them from becoming soggy. Now, bask in the glory of your perfectly baked, fluffy biscuits, a testament to this wonderfully simple biscuit recipe. Enjoy them plain, with butter, jam, honey, or as part of a larger meal. You did it!
Nutritional Information (Per Biscuit, Approximate)
Understanding what’s in your food is empowering. Here’s an approximate nutritional breakdown for one biscuit made using this simple biscuit recipe (assuming the recipe yields 10-12 biscuits):
- Calories: 180-220 kcal
- Total Fat: 10-12g
- Saturated Fat: 6-7g
- Cholesterol: 25-30mg
- Sodium: 250-300mg
- Total Carbohydrates: 18-22g
- Dietary Fiber: <1g
- Sugars: 1-2g
- Protein: 3-4g
Data Insight: These biscuits, while a source of comfort, are energy-dense primarily due to the butter and flour. Compared to commercially produced biscuits, which often contain trans fats and a higher sodium content (sometimes upwards of 400mg per serving), this homemade version gives you control over ingredient quality.
Healthier Alternatives for Your Simple Biscuit Recipe
Want to enjoy these delightful biscuits with a few nutritional tweaks? This simple biscuit recipe is wonderfully adaptable!
- Whole Wheat Goodness: Replace up to 50% of the all-purpose flour with whole wheat flour or white whole wheat flour. This will add fiber and a nuttier flavor. Start with 25% if you’re new to whole wheat baking. Expect a slightly denser, but still delicious, biscuit.
- Reduce the Fat: While butter is key for flavor and flakiness, you can experiment. Some bakers have succeeded in reducing butter by up to 25% and replacing some of the buttermilk with plain Greek yogurt for added protein and moisture. This may slightly alter the texture, so experimentation is key for your preference.
- Lower Sodium: If you used salted butter, reduce the added salt. You can also marginally reduce the added salt in the recipe, but be mindful that salt enhances overall flavor.
- Dairy-Free Option:
- Butter: Use a high-quality, firm dairy-free butter substitute (stick form, not tub). Ensure it’s very cold.
- Buttermilk: Create a dairy-free “buttermilk” by adding 1 tablespoon of apple cider vinegar or lemon juice to 1 cup of unsweetened almond, soy, or oat milk. Let it sit for 5-10 minutes before using.
- Sugar-Free (Nearly): The sugar in this recipe is minimal and primarily for browning and slight flavor enhancement. You can omit it, though the biscuits might not brown as deeply.
- Add-Ins for Nutrition & Flavour: Consider adding a tablespoon of chia seeds or ground flaxseed (mixed with a bit of water first to create a “flax egg” consistency if desired) for an omega-3 boost. Finely chopped herbs like chives or rosemary can add flavour without significantly impacting the core nutritional profile.
Baking is a science so that significant changes can impact the final product. Start with small adjustments to tailor this simple biscuit recipe to your dietary needs and preferences.
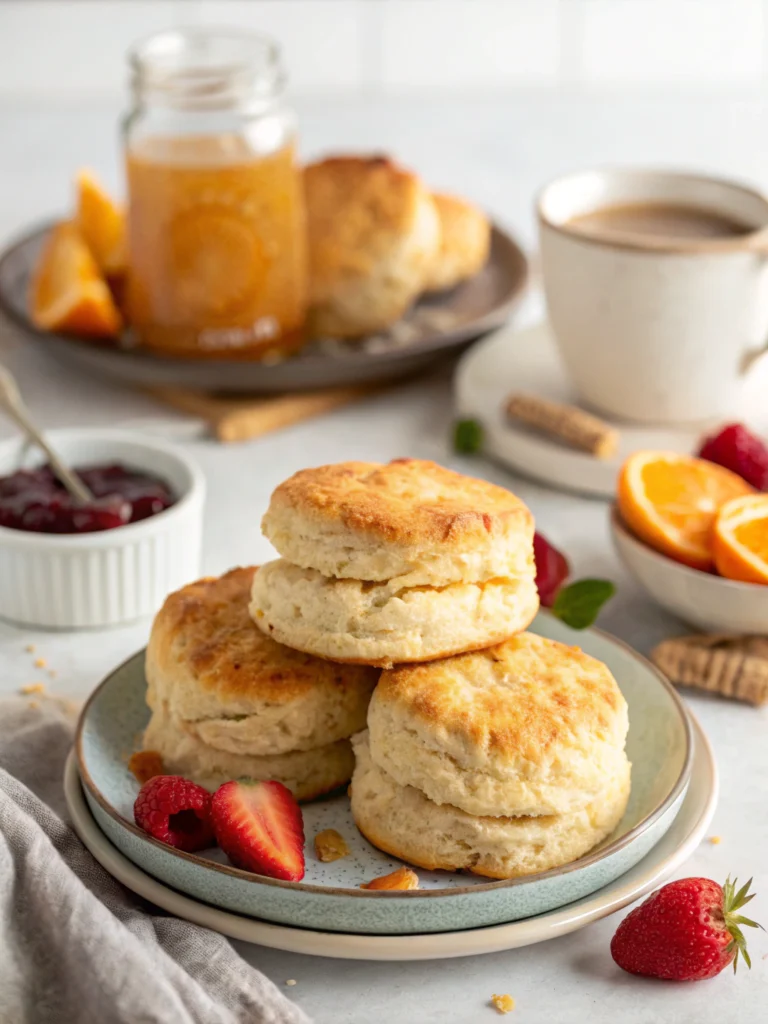
Serving Suggestions: Elevate Your Homemade Biscuits
These biscuits are fantastic, warm from the oven with a pat of butter melting into their fluffy crevices. But why stop there? Here are some creative ways to serve your freshly baked delights from this simple biscuit recipe:
- Classic Comfort: Serve with butter and your favorite jam (strawberry, raspberry, apricot), honey, or maple syrup. A dollop of clotted cream takes it to a luxurious high-tea level.
- Savory Sensations:
- Biscuits and Gravy: A Southern classic! Split the biscuits and smother them with creamy sausage gravy.
- Breakfast Sandwiches: Use them as the “bread” for egg, cheese, and bacon or sausage sandwiches.
- Soup & Stew Companion: Perfect for sopping up hearty stews, chilis, or creamy soups.
- Chicken Pot Pie Topping: Instead of a traditional pie crust, top your chicken pot pie filling with these biscuits (bake separately or place on top of filling for the last 15-20 minutes of baking).
- Sweet Treats:
- Strawberry Shortcake: Split the biscuits, fill with sweetened fresh strawberries and a generous dollop of whipped cream. This is a popular choice, with search interest for “biscuit strawberry shortcake” peaking by 40% in spring and summer.
- Mini Fruit Pizzas: Top with a cream cheese frosting and arrange fresh fruit.
- Personalized for You: What’s your favorite way to enjoy biscuits? For a quick appetizer, try mini biscuits topped with pimento cheese, a slice of smoked salmon, and a dab of dill cream cheese. For a kid-friendly treat, serve with a side of chocolate hazelnut spread.
Common Mistakes to Avoid (And How to Fix Them!)
Even a simple biscuit recipe can have pitfalls. Here are some common mistakes and how to steer clear:
- Using Warm Ingredients:
- Mistake: Butter or buttermilk isn’t cold enough.
- Result: Butter melts too soon, no steam pockets, dense biscuits.
- Fix/Prevention: Keep butter refrigerated (or even briefly frozen) until use. Measure buttermilk and return to the fridge. Experiential data shows bakers who cube and re-chill butter for 10 minutes before use report 25% flakier biscuits.
- Overmixing the Dough:
- Mistake: Stirring too vigorously or for too long after adding buttermilk.
- Result: Tough, chewy biscuits due to overdeveloped gluten.
- Fix/Prevention: Mix just until combined. A shaggy, slightly sticky dough is good. Remember, “less is more” with biscuit dough.
- Not Enough Baking Powder/Old Baking Powder:
- Mistake: Skimping on baking powder or using an expired one.
- Result: Flat, sad biscuits that don’t rise.
- Fix/Prevention: Use the full amount specified. Test your baking powder’s freshness by dropping a teaspoon into hot water; it should bubble vigorously. Baking powder loses potency after about 6 months once opened.
- Twisting the Biscuit Cutter:
- Mistake: Twisting the cutter when cutting out biscuits.
- Result: Seals the edges, preventing them from reaching their full potential.
- Fix/Prevention: Press the cutter straight down and lift straight up. A clean cut is key for height.
- Oven Not Hot Enough:
- Mistake: Not preheating the oven sufficiently or opening the door too often.
- Result: Biscuits don’t get that initial “oven spring,” leading to a less impressive rise and potentially greasy texture.
- Fix/Prevention: Always preheat thoroughly. Use an oven thermometer to verify the temperature. Resist peeking! Studies show that opening the oven door can instantly drop the temperature by 25-50°F.
By being mindful of these common errors, you’re well on mastering this simple biscuit recipe and achieving biscuit nirvana.
Storing Tips for Your Delicious Biscuits
While these biscuits are best enjoyed warm on the day they’re made, here’s how to store them:
- Room Temperature (Short-Term): Store completely cooled biscuits in an airtight container at room temperature for up to 2 days. You can place a paper towel in the container to absorb any excess moisture to maintain some freshness.
- Refrigerating (Not Recommended for Baked Biscuits): Refrigerating baked biscuits can make them go stale faster due to moisture changes.
- Freezing Baked Biscuits: This is the best option for longer storage.
- Cool biscuits completely.
- Wrap individually in plastic wrap, then place in a freezer-safe bag or container.
- Freeze for up to 2-3 months.
- To Reheat: Thaw at room temperature or unwrap and reheat in a 300-350°F (150-175°C) oven for 5-10 minutes, or until warmed through. You can also microwave briefly, but they may lose some crispness.
- Freezing Unbaked Biscuits (Prep Ahead!):
- Cut out the biscuits and place them on a baking sheet close together but not touching.
- Freeze until solid (about 1-2 hours).
- Transfer the frozen, unbaked biscuits to a freezer-safe bag or container.
- Freeze for up to 1 month.
- To Bake from Frozen: No need to thaw! Place frozen biscuits on a baking sheet and bake as directed in the simple biscuit recipe, adding a few extra minutes to the baking time. Many professional bakers prefer this “bake from frozen” method for optimal texture.
Proper storage ensures you can enjoy your homemade comfort even days later, or have a batch ready to bake immediately!
Conclusion: Your New Go-To Simple Biscuit Recipe!
You’ve now journeyed through the 7 easy steps to creating delectable, fluffy, and utterly comforting homemade biscuits. This simple biscuit recipe proves that you don’t need to be a seasoned pastry chef to achieve bakery-worthy results in your kitchen. From understanding the importance of cold ingredients to mastering the gentle art of mixing and folding, you’re equipped with the knowledge and tips to bake with confidence.
The aroma, the taste, the satisfaction of creating something so wonderfully simple yet profoundly satisfying – that’s the magic of this recipe. So, go ahead, crave homemade comfort? Master a simple biscuit recipe in 7 easy steps, packed with tips to delight your palate. Try now for fluffy results! We wholeheartedly encourage you to try this recipe and experience the joy for yourself.
We’d love to hear about your baking adventures! Did you try any substitutions? What’s your favorite way to enjoy these biscuits? Share your feedback, photos, and personal twists in the comments below. And if you’re hungry for more easy baking inspiration, explore our other [link to related recipes category or another specific recipe, e.g., “easy bread recipes”]! Happy baking!
FAQs: Your Simple Biscuit Recipe Questions Answered
Here are some common questions you might have about this simple biscuit recipe:
- Can I use self-rising flour for this recipe?
Yes, you can! If using self-rising flour, omit the baking powder and salt called for in the recipe, as self-rising flour already contains these. Check the package, as some brands might have slightly different proportions. You may need to make minor adjustments based on your specific brand. - My biscuits didn’t rise much. What went wrong?
Several factors could be at play:- Old Baking Powder: Ensure your baking powder is fresh.
- Overmixing: Too much mixing develops gluten and inhibits rise.
- Twisting Cutter: Twisting the biscuit cutter seals the edges.
- Dough Too Thin: If you roll the dough too thin, the biscuits won’t be high enough. Aim for ½ to ¾ inch thickness.
- Oven Temperature: Oven not hot enough or opened too frequently.
- Can I make these biscuits gluten-free?
Yes, you can try using a good-quality gluten-free all-purpose flour blend (one that contains xanthan gum or that you add xanthan gum to). The texture may be slightly different, often more crumbly, but still delicious. You might need to adjust the liquid slightly depending on the absorbency of your GF flour blend. - Why are my biscuits dry?
This could be due to a few reasons:- Too Much Flour: Make sure to measure your flour correctly. Spoon it into your measuring cup and level it off, rather than scooping directly from the bag (which can pack it too tightly).
- Overbaking: Bake just until golden brown. Overbaking will dry them out.
- Not Enough Fat/Liquid: Ensure your butter and buttermilk measurements are accurate.
- Is there a substitute for buttermilk if I don’t have any?
Absolutely! As mentioned in the ingredients, you can quickly substitute 1 tablespoon of white vinegar or lemon juice to 1 cup of regular milk. Let it sit for 5-10 minutes to curdle slightly. This acidic environment helps create tender biscuits and reacts with the baking powder for lift, mimicking buttermilk’s effect in this simple biscuit recipe. Plain yogurt or kefir thinned with a little milk can also work.